Bootstrap Checkbox Position
Overview
Sometimes the easiest features might just become extremely necessary-- specifically each time you come to need them. As an example exactly how do your visitors interact with the pages you set up stating a simple Boolean action-- simply just yes or no regarding a number of the thoughts you need to ask, the way they do accept the conditions or line up a few of the attainable choices they might have. We often surpass this without paying much of an interest to the component chargeable for these sorts of actions however the Bootstrap Checkbox Field is really a pretty serious feature-- one our forms just can't actually perform without.
In current fourth version of the Bootstrap framework we are delivered with the
.form-check.form-check-label<div>.form-check.form-check-label<label><input>.form-check-inputExactly how to use the Bootstrap checkbox:
The checked state for these buttons is only updated via click event on the button.

<div class="btn-group" data-toggle="buttons">
  <label class="btn btn-primary active">
    <input type="checkbox" checked autocomplete="off"> Checkbox 1 (pre-checked)
  </label>
  <label class="btn btn-primary">
    <input type="checkbox" autocomplete="off"> Checkbox 2
  </label>
  <label class="btn btn-primary">
    <input type="checkbox" autocomplete="off"> Checkbox 3
  </label>
</div>
In some cases we want to have the checkboxes to take place inside our forms without the customer actually having the capacity to have any sort of activity selecting them-- that is generally where the disabled option comes in.
In order to disable properly a checkbox in Bootstrap 4 applying the standard HTML attribute
disabledIn case that you find appealing the concept and indeed wish to carry this out you need to appoint the
.disabled.form-checkYet another representation
Whenever you are using checkboxes, wrap all of them in a
<label>.custom-control.custom-checkboxWork with
.custom-control-input<input>Additionally apply two
<span>.custom-control-indicator.custom-control-description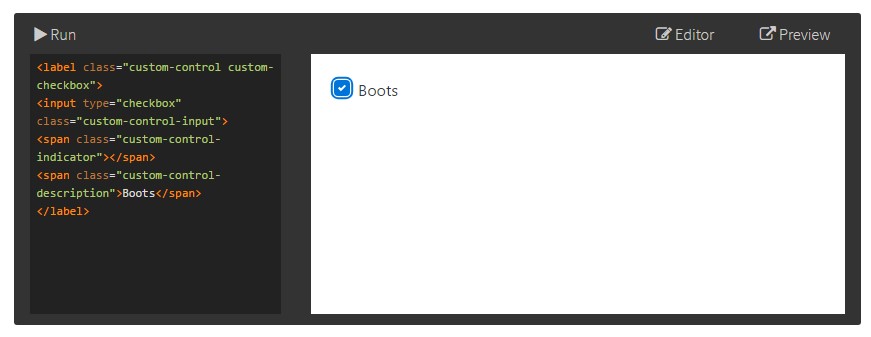
<label class="custom-control custom-checkbox">
<input type="checkbox" class="custom-control-input">
<span class="custom-control-indicator"></span>
<span class="custom-control-description">Boots</span>
</label>
Bootstrap Checkbox Input forms
Default checkboxes and radios are enhanced upon with the assistance of
.form-checkDisabled checkboxes and radios are provided, but to deliver a
not-allowed<label>.disabled.form-checkA new thing for the Bootstrap version 4 system is the launch of the so called custom form components. These are actually the very same components we are knowing inside capability though styled a lot more desirable and with the Bootstrap method. By having them you can surely provide special taste as well as individuality to your web content via just delegating a number of extra classes to the controls you incorporate in your forms.
If you want to apply custom checkboxes wrap them within a
<label>.custom-control.custom-checkbox<input>.custom-control-input<span>.custom-control-indicator.custom-control-descriptionConclusions
That's pretty much all you should perform in order to set a checkbox feature for your Bootstrap 4 powered website and provide some custom made flavor to it adding in it a quality appearances. And now all you need to do is repeat the drill unless you've inspected every one of the checkboxes wanted are already on the web page.
Check a few video clip short training about Bootstrap checkbox
Related topics:
Bootstrap checkbox official information

Centering checkbox buttons in Bootstrap 4 row

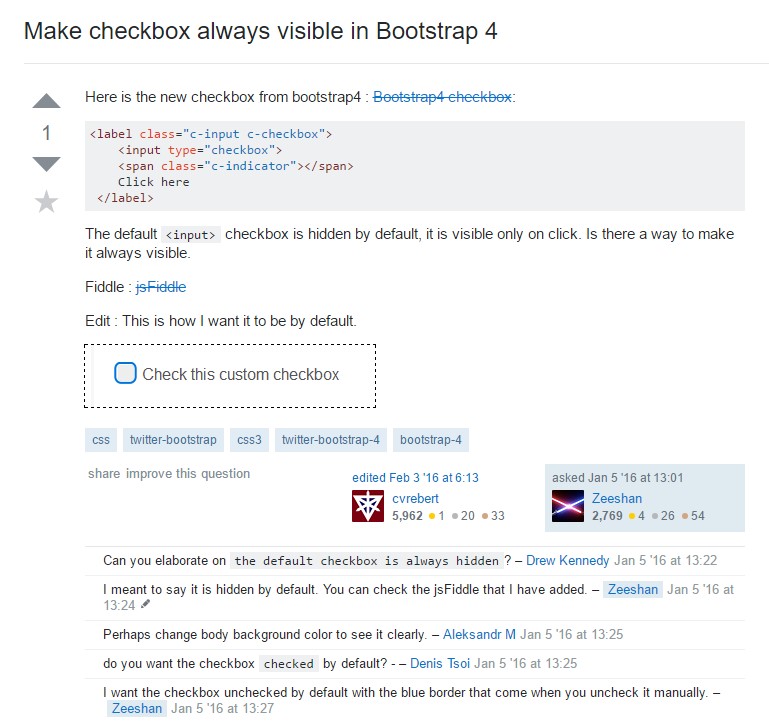
Make checkbox always visible in Bootstrap 4